DIY Button Bracelet
We may earn money or products from the companies mentioned in this post.
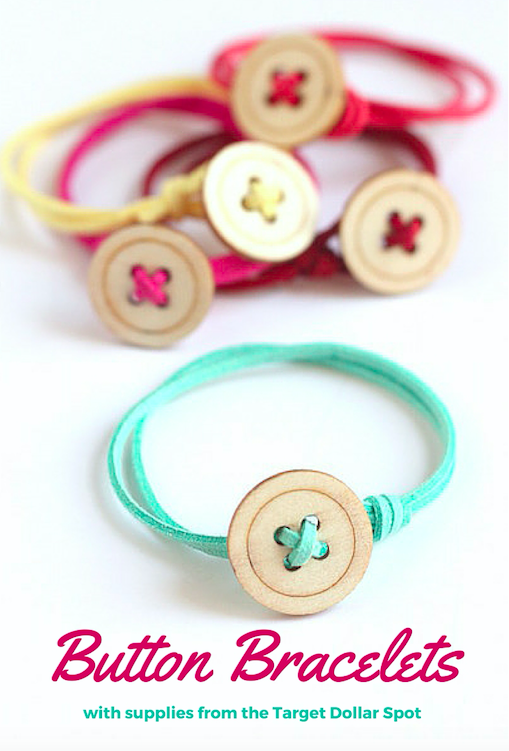
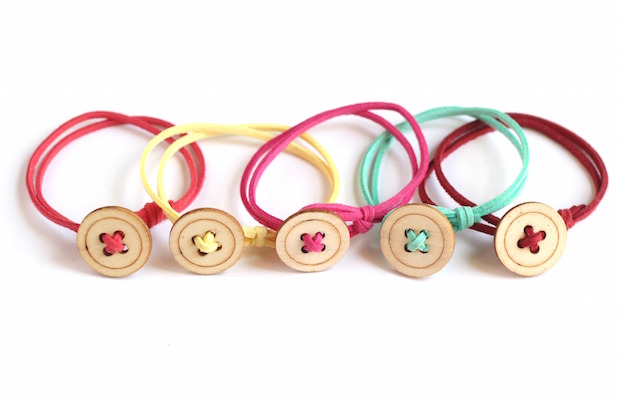
I found these wood buttons and faux suede cording laying next to each other in a bin at Bullseye’s Playground. I loved the simplicity of the buttons and the bright colors of the cording. With a package of each I was able to make these colorful button bracelets.

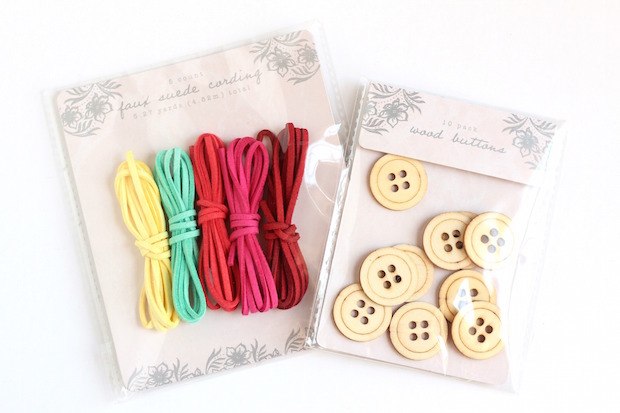
You’ll need:
- faux suede cording (buy from Amazon)
- wood buttons (buy from Amazon)
- scissors
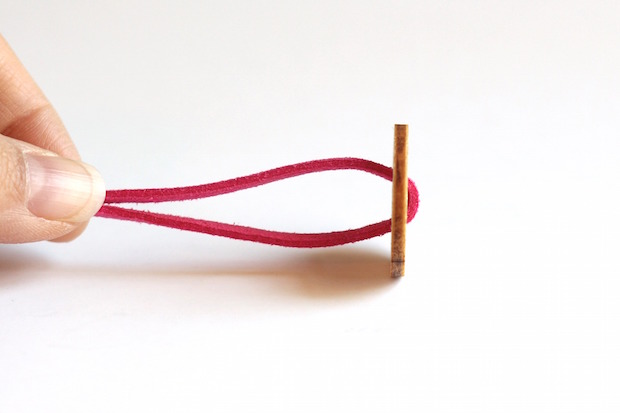
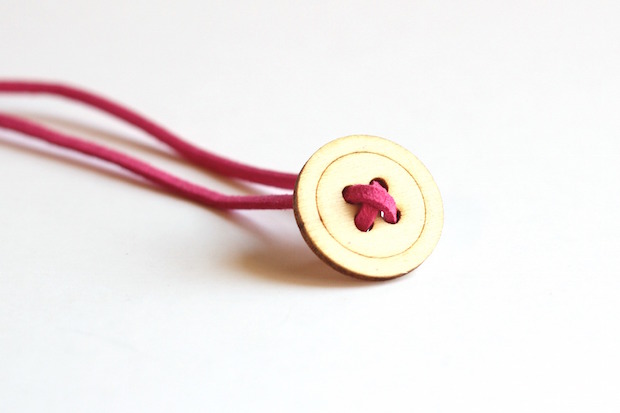
Thread the cord through two button holes so the ends of the cord are on the backside of the button.
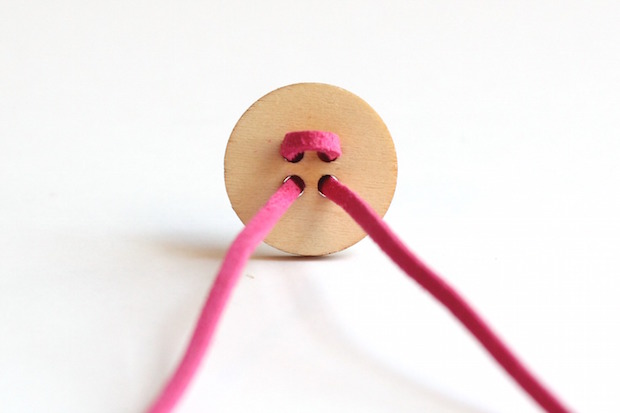
Take one end of the cord and pull it back through another hole towards the front of the button.
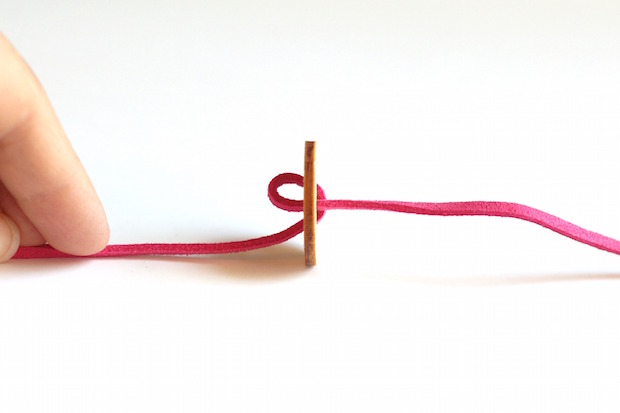
Pull it through the remaining button hole towards the back of the button.
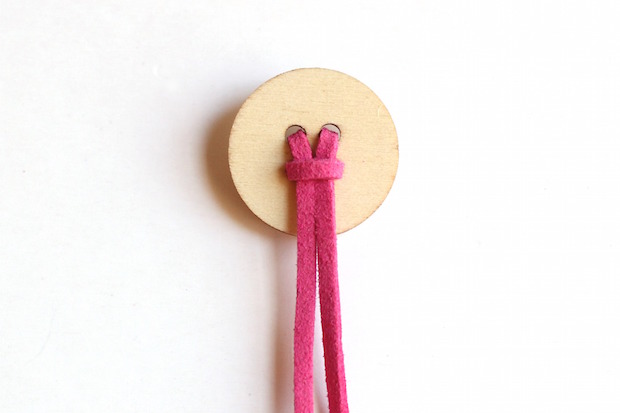
Leave a little bit of space to create a small loop in the back.
Pull the cords through the loop and the button should lay flat.
Grab both ends and tie a knot to finish the bracelet. Make sure you leave a loop big enough for the button to slide through.
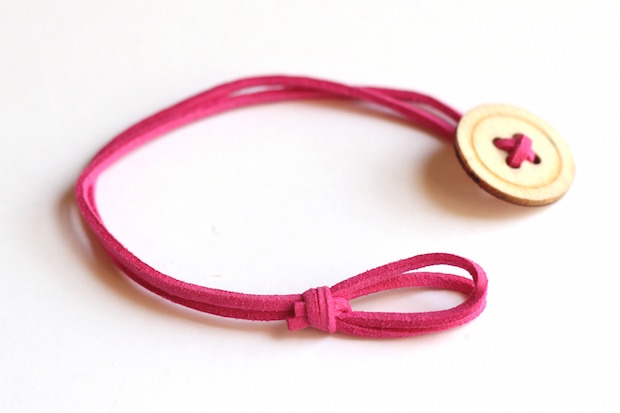
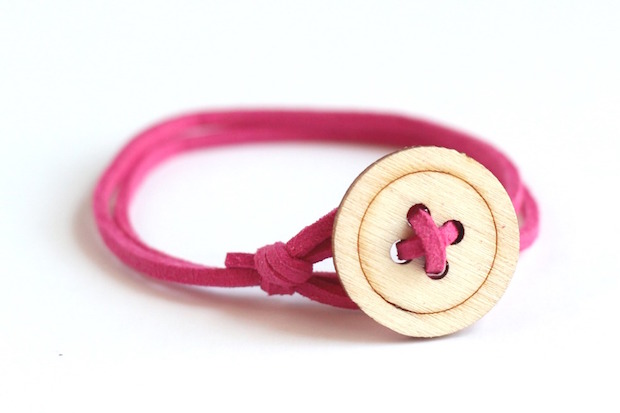
I was able to get one adult sized bracelet out of each color of cording. They’re lightweight and so comfortable to wear. You could even stack a few on your wrist for a stylish accessory that will match whatever you’re wearing.
 Analisa is a mom and avid DIYer. Along with her family, she will travel anywhere just to say she’s been. She writes about creating, parenthood, and her family’s adventures at Parental Perspective. She’d love to meet you so feel free to visit her on Instagram or Facebook and say hello!


We bought the supplies at Target for 70% off yesterday and made these this morning. My daughters loved it, thank you for sharing such a great idea 🙂
That’s awesome!
Post parfait : liste des fournitures et fournisseurs, explications claires. On voit trop de produits à acheter tout faits dans la rubrique Diy ! Bravo et merci.
Planning to buy a big roll of the cording, any idea what length piece of string you’d cut to make an adult sized bracelet? Making them with my students for Mother’s Day 🙂
I’d like to know too. I bought the same kind of cord but one length is too long.
A standard size adult bracelet is 7”. I would 18” so you have enough to tie off and slide over the button. Maybe measure the wrist, double it and add 3” for tiring the loop.
How long would it be for a teen wrist?
What size are the buttons? I tried to buy the one from the link on amazon and they are a lot smaller than the ones in your pictures. Also, the holes are too small for the cord to fit through. Thank you.
Hello!
I was wondering if I might be able to feature your button bracelet tutorial on my blog http://www.theoffyourtrolleyblog.com
I will link back to your site with full credits 🙂
Thanks!
Jenny
Thank for your sharing! I love the simple design and bright colors. I think I may purchase the items for my students to make a bracelet for their moms for Mother’s Day.
Those are so cute! Going to spend our weekend making a few!
I would love to make these for my daughters fundraiser!
Will make these with the group I take for craft each month. Thank you.
So cute. I’m doing this with my kids. I think it would also make a cute hair tie if you used stretchy cord/elastic instead of regular cord.
Love this. I’m going to make these but I can’t figure out how to tie it. Someone help or show a video or so. I’m not very creative. Lol
Hi Sheridan,
We actually have a video in the works. I will let you know as soon as it is up.
Is there a video to show how to tie this bracelet?
Not currently, but I have one in the works! Stay tuned
This is really cool and informative post! Thank you! Looking forward to it!